Want to run a macro but don’t know how to use a macro in the Fisch Roblox game on a Windows system? Don’t worry—this guide will walk you through everything step by step.
Since the release of Fisch Macro, many players have shown strong interest due to its impressive daily results. Macro developers regularly fix bugs and release new versions to improve performance and reliability, ensuring a smooth experience for users.
Let’s get started.
How to Use Fisch Macro
Using Fisch Macro is simple if you follow the setup process correctly. The full setup includes display settings, AutoHotkey installation, Roblox settings, and in-game Fisch settings. Make sure to follow each step carefully.
Display Settings
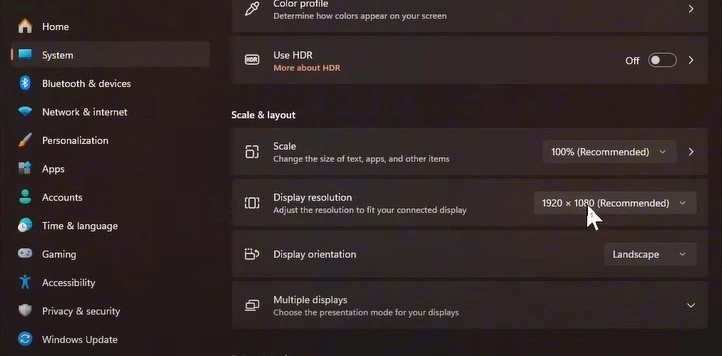
- Open the Windows search bar and search for Display Settings using Windows + S.
- Turn off the HDR option. If your display does not support HDR, it will already be disabled.
- Set your display resolution to the highest available option. A resolution of 1920×1080 works best.
- Set display scale to 100 percent.
- If you are using a second monitor, disconnect it.
- Turn off Windows notifications and any overlays that may appear over the game.
AutoHotkey Installation
During the installation process, AutoHotkey may be blocked by your antivirus. If this happens, temporarily disable your antivirus software.
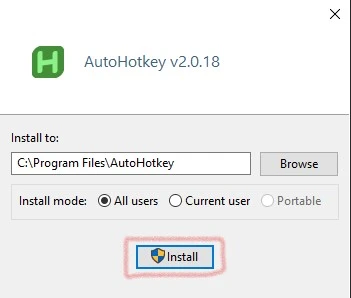
- Go to autohotkey.com and download both version 2.0 and version 1.1 (deprecated).
- Install AutoHotkey version 2.0 first and ensure it is installed in the following path: C:\Program Files\AutoHotkey
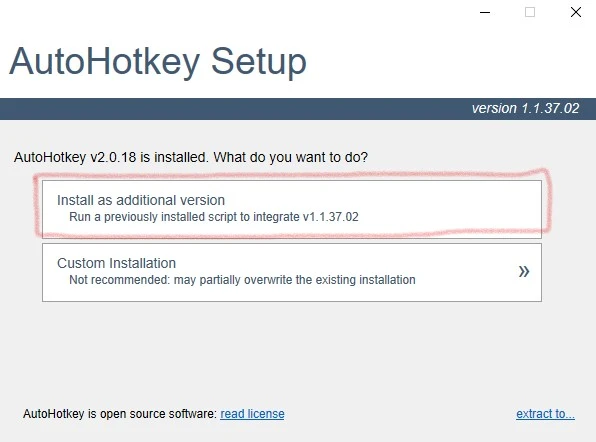
- After that, install version 1.1 and select the option Install as additional version.
Roblox Settings
- Use the Roblox Player, not the browser version.
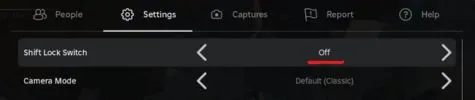
- Turn off Shift Lock Switch.
- Disable Fullscreen mode.
- Make sure UI Navigation Toggle is enabled.
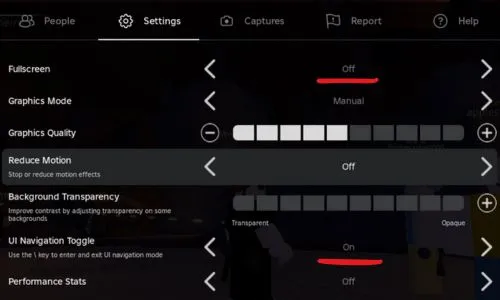
- Set Graphics Mode to Manual and Graphics Level to 1.
- Turn off Chat, Leaderboard, and Quest UI elements.
- Use a black-colored avatar for best detection accuracy.
Fisch Game Settings
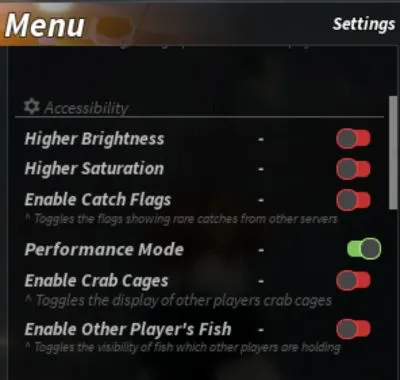
Open the in-game menu and turn off Higher Brightness.
Disable Higher Saturation.
Enable Performance Mode.
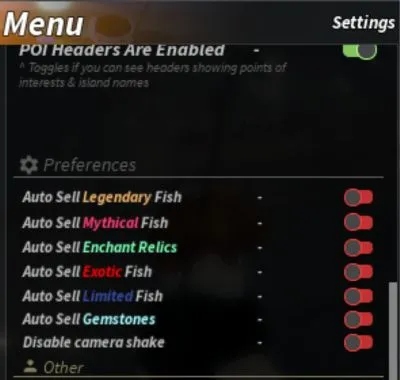
- Scroll down and turn off “Disable Camera Shake” from the Preferences option.
Fisch Macro Controls
Once setup is complete, you can control the macro using the following keys:
- Press P to start the macro.
- Press O to reload the macro.
- Press M to exit the macro.
Xan Macro Settings
Xan Macro comes with a new user interface, but setup is still simple. After downloading, launch Xan Macro version 2.1. You will see four tabs. Follow the steps below for each section.
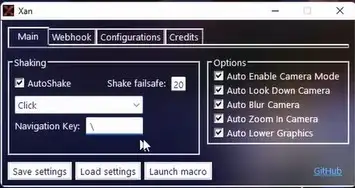
Xan Main Tab
- Enable the Autoshake option and set Shake Failsafe to 20.
- Select Click as the shake method.
- Set the navigation key to \
- Enable all available options including Auto Enable Camera Mode, Auto Look Down Camera, Auto Blur Camera, Auto Zoom In Camera, and Auto Lower Graphics.
- Click Save Settings.
Configurations
All configuration settings are applied by default. However, you can modify them based on your preferences if needed.
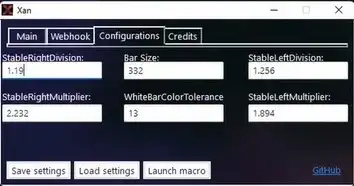
After making any changes, click “Load Settings” and then “Launch Macro.”
That’s it—you are now using the Xan Fisch Macro successfully.
Fisch Macro v12 Settings
Fisch Macro v12 has been released recently and comes with several useful improvements. It includes webhook support, a user-friendly GUI for easier setting adjustments, the ability to use bait while fishing, and more accurate minigame features. One of the best additions is automatic saving of your applied settings to a TXT file on your computer, along with the option to import saved settings in a single click.
Let’s get started.
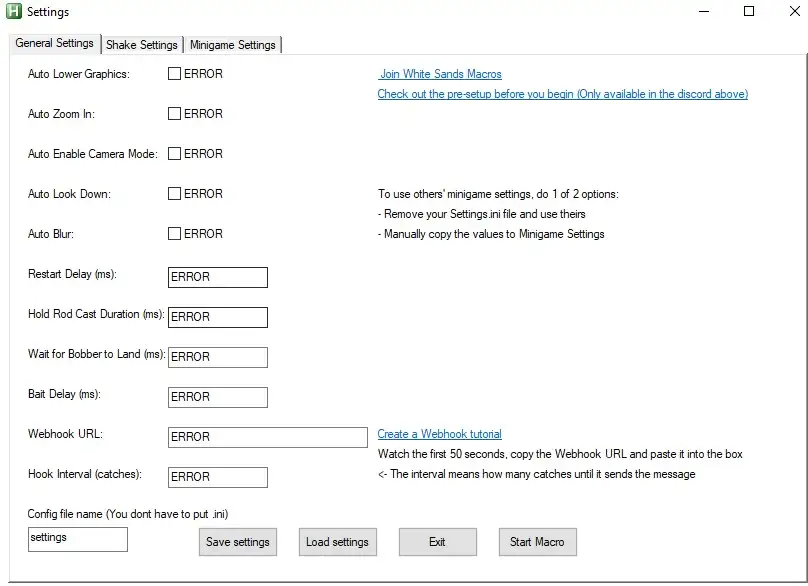
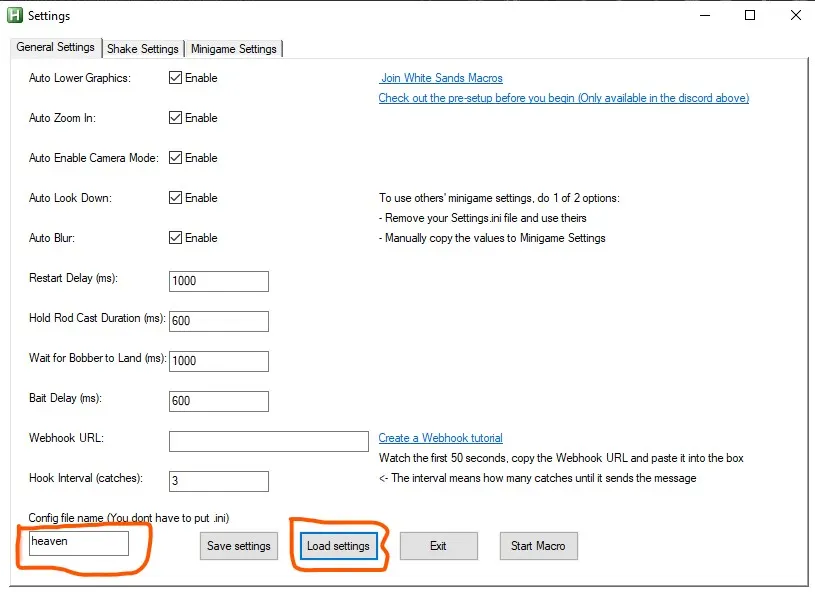
General Settings
- Enable Auto Lower Graphics, Auto Zoom In, Auto Enable Camera Mode, Auto Look Down, and Auto Blur.
- If you have a webhook URL, paste it here. If not, you can skip this step or follow a webhook tutorial.

Shake Settings
Choose between Click or Navigation for the shake method based on your preference.
Minigame Settings
- Minigame settings are already optimized by default. If you want to customize them, refer to the provided documentation.

After finishing all settings, click Save Settings, then Load Settings, and finally Start Macro.
Error Fix
If you encounter an error during macro execution, exit the macro completely. Restart it, reconfigure the settings, and start again. This usually resolves most issues.
Import Saved Config Settings
You can quickly load saved configurations using the import feature. Select your saved config file and click Load Settings. Once loaded, you are ready to start the macro instantly.
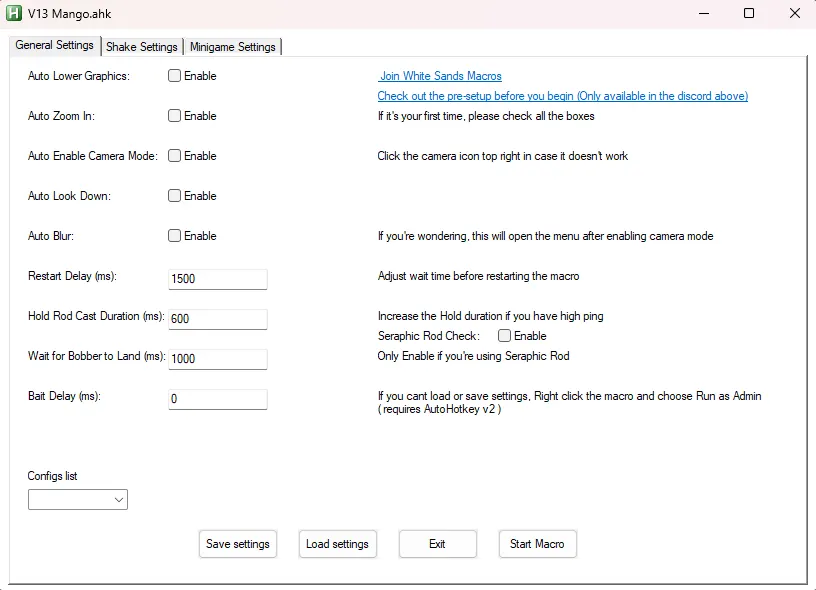
Fisch Macro v13 Settings
Fisch Macro version 13 introduces support for the Seraphic Rod. All other rod configuration settings are already included by default. Currently, webhook functionality is not available in this version.
Final Notes
That’s everything you need to know to successfully run Fisch Macro. If you face any issues, carefully reread the steps and restart the macro setup from the beginning. Proper configuration ensures smooth performance and better results.